
The objective of this experiment is to demonstrate how to control a relay module using the Raspberry Pi Pico with Micro Python. A relay is an electrically operated switch that allows the Pico to control high voltage devices (like lights, fans, or other appliances) with a low voltage signal. In this experiment, the relay will be turned ON and OFF alternately every second, showing the basic concept of digital output control.
Buy Basic Raspberry Pi Pico Kit
Items Required:
- Raspberry Pi Pico
- 1-channel Relay Module (5V or 3.3V compatible)
- Breadboard
- Jumper wires
- Micro USB B cable
- Thonny IDE on a computer
Connection:
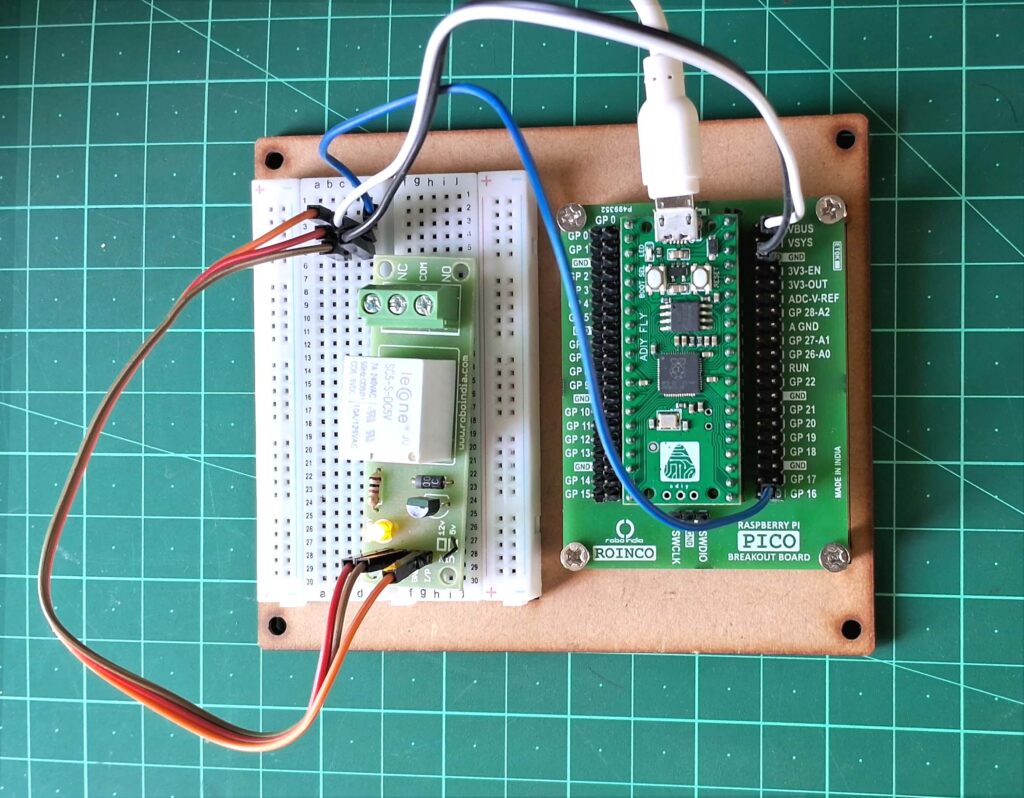
Connect the IN pin of the relay module to GPIO16 of the Raspberry Pi Pico.
Connect the VCC pin of the relay module to the 3.3V or 5V supply on the Pico (check your relay module specification).
Connect the GND pin of the relay module to the GND pin of the Pico.
Make sure the relay is not connected to any high-voltage AC device during testing unless proper precautions and isolation are used.
Code:
from machine import Pin
import time

relay = Pin(16, Pin.OUT)

while True:
time.sleep(1)
relay.value(1)
time.sleep(1)
relay.value(0)Results:
When the code is uploaded and run on the Raspberry Pi Pico, the relay will turn ON for 1 second, then OFF for 1 second, continuously. You will hear a clicking sound from the relay indicating it is switching states. This confirms that the GPIO pin is successfully controlling the relay through digital output. This experiment demonstrates the basic working of GPIO pin control over electromechanical components such as a relay.