
This tutorial of Robo India is a basic tutorial for the ESP32-CAM board, how to setup a video streaming local web server with face recognition and detection with Arduino IDE.
1. Introduction:
This tutorial explains how to setup ESP32-CAM board for video streaming local web server with face recognition and detection with Arduino IDE.
2. Hardware required
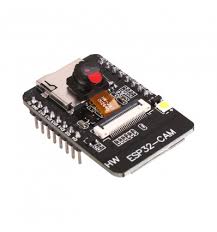
- ESP32-CAM
- FTDI programmer
- Jumper wire
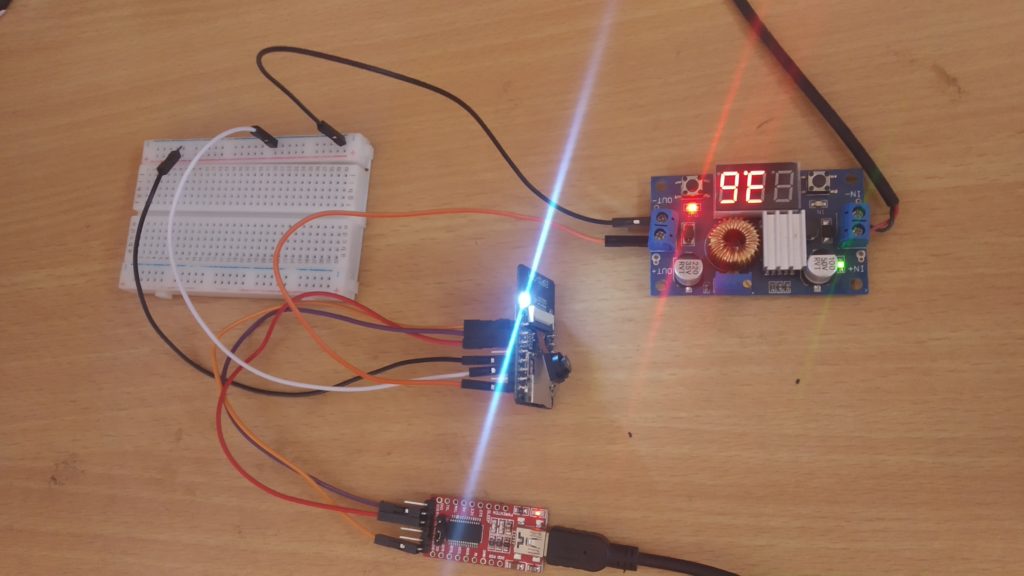
3.circuit
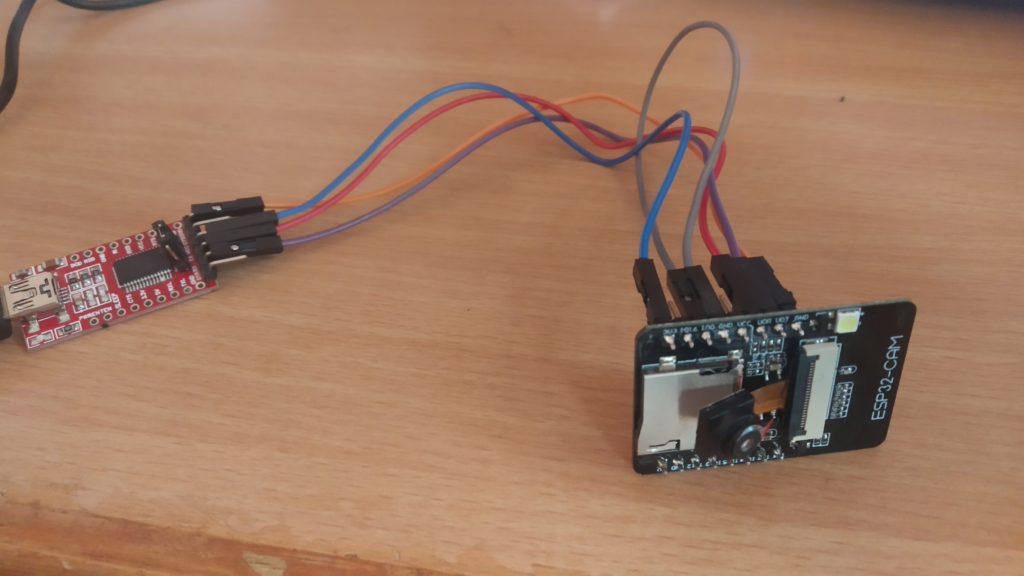
4. Connections:
| ESP32-CAM | FTDI 3.3V |
| UDR | TX |
| UTD | RX |
| 3.3V | Vcc |
| GND | GND |
Additionally, GPIO 0 also plays an important role, since it determines whether the ESP32 is in flashing mode or not. When GPIO 0 is connected to GND, the ESP32 is in flashing mode.
NOTE: connect GPIO 0 with GND.
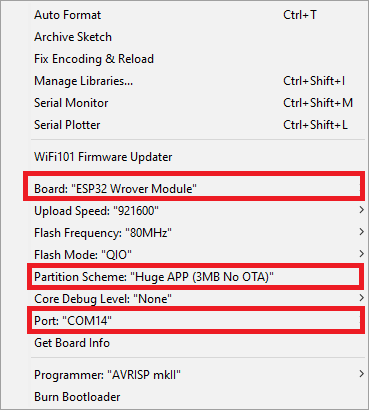
5. Software Setup:
Firstly, Download ESP32 Board in Arduino IDE, from Board Manager.
- Go to Tools > Board and select ESP32 Wrover Module
- Go to Tools > Port and select the COM port the ESP32 is connected to
- In Tools > Partition Scheme, select “Huge APP (3MB No OTA)“
6. Coding
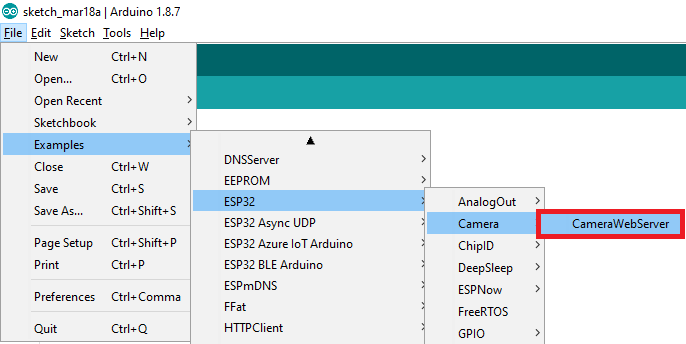
The following code should load.

Before uploading the code, you need to insert your network credentials in the following variables:
const char* ssid = "REPLACE_WITH_YOUR_SSID";
const char* password = "REPLACE_WITH_YOUR_PASSWORD";
Then, make sure you select the right camera module. In this case, we’re using the AI-THINKER Model.
So, comment all the other models and uncomment this one:
#define CAMERA_MODEL_AI_THINKERNow, the code is ready to be uploaded to your ESP32.
7. Upload Code
Connect the ESP32-CAM board to your computer using an FTDI programmer.
Important: GPIO 0 needs to be connected to GND so that you’re able to upload code.
- Press the ESP32-CAM on-board RESET button
- Then, click the upload button to upload the code
Important: if you can’t upload the code, double-check that GPIO 0 is connected to GND and that you selected the right settings in the Tools menu. You should also press the on-board Reset button to restart your ESP32 in flashing mode.
8. Getting the IP address :
After uploading the code, disconnect GPIO 0 from GND.
Open the Serial Monitor at a baud rate of 115200. Press the ESP32-CAM on-board Reset button.
The ESP32 IP address should be printed in the Serial Monitor.
9. Accessing the Video Streaming Server
Now, you can access your camera streaming server on your local network. Open a browser and type the ESP32-CAM IP address. Press the Start Streaming button to start video streaming.
You also have the option to take photos by clicking the Get Still button. Unfortunately, this example doesn’t save the photos, but you can modify it to use the on board microSD Card to store the captured photos.
There are also several camera settings that you can play with to adjust the image settings.
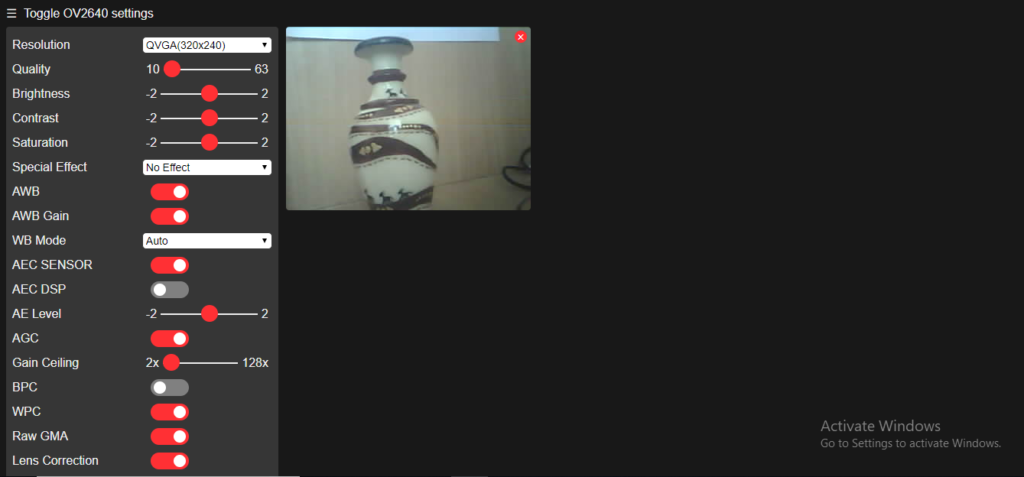
Finally, you can do face recognition and detection.
First, you need to enroll a new face. It will make several attempts to save the face. After enrolling a new user, it should detect the face later on.
You might find error like brownout detector was triggered.
Then you follow the circuit :
If you have any query please write us at support@roboindia.com
Thanks and Regards
Content Development Team
Robo India
https://roboindia.com
Thanks for the great tutorial. Can you please explain how to broadcast the streaming over internet using port forwarding or any other alternate methods.