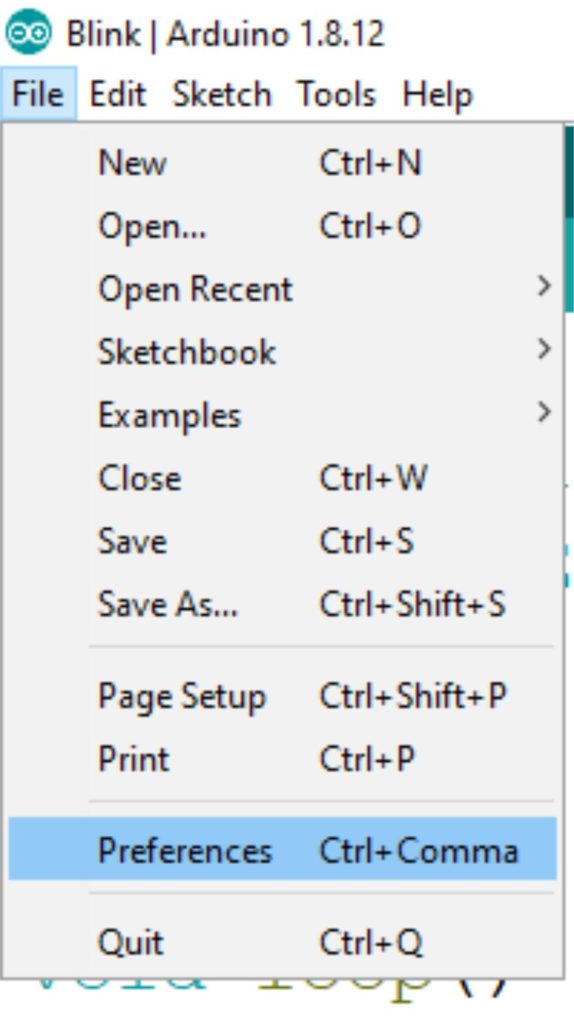
Step 1: Go to File > Preferences
Step 2: Enter this link “http://arduino.esp8266.com/stable/package_esp8266com_index.json” into the “Additional Board Manager URLs” as shown below and press “OK“

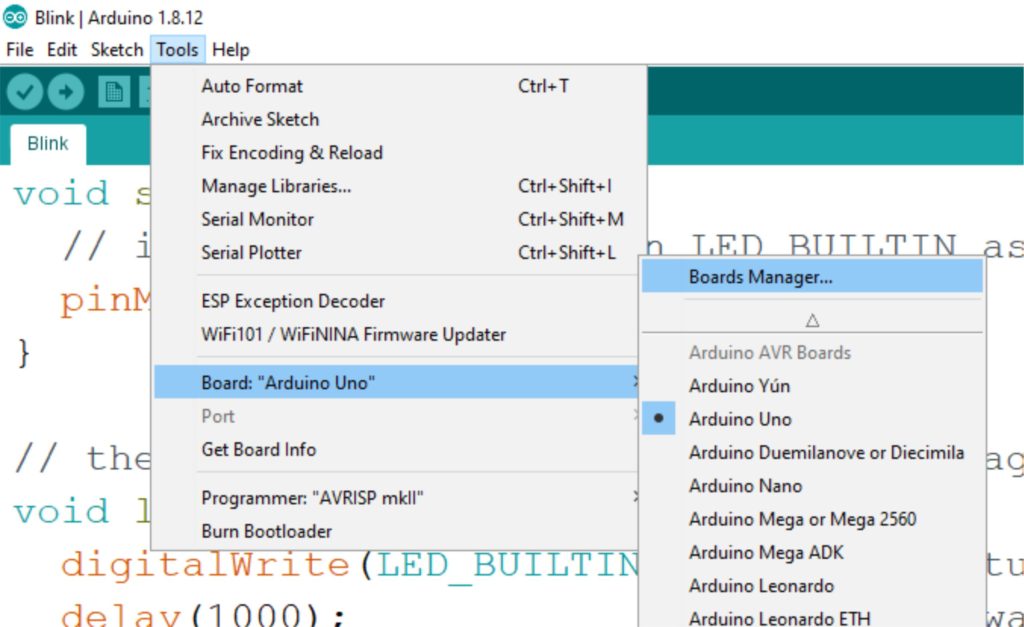
Step 3: Go to Tools > Board > Boards Manager
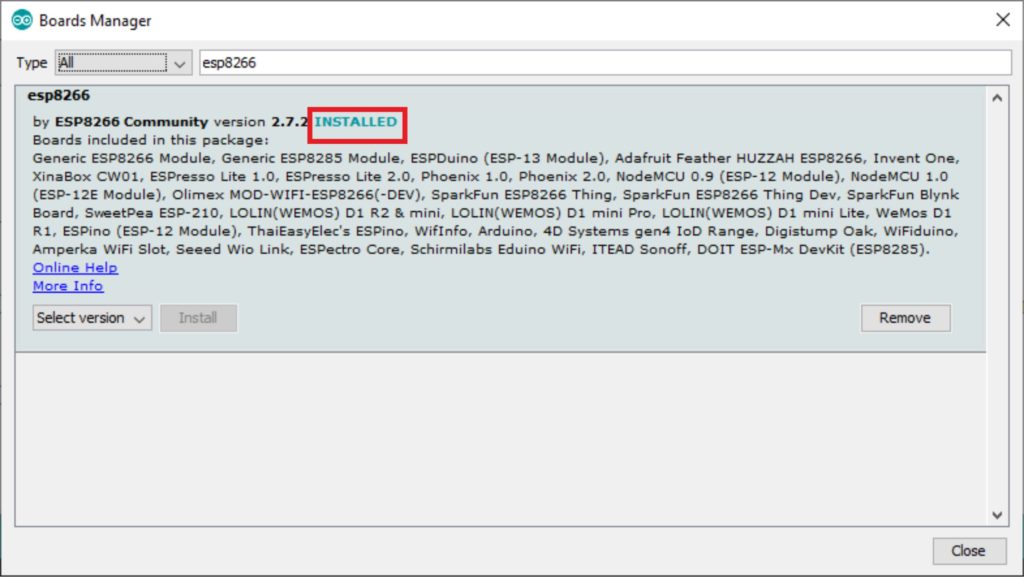
Step 4: In Boards Manager search for ESP8266, and click install on “esp8266 by esp8266 community” as shown below.
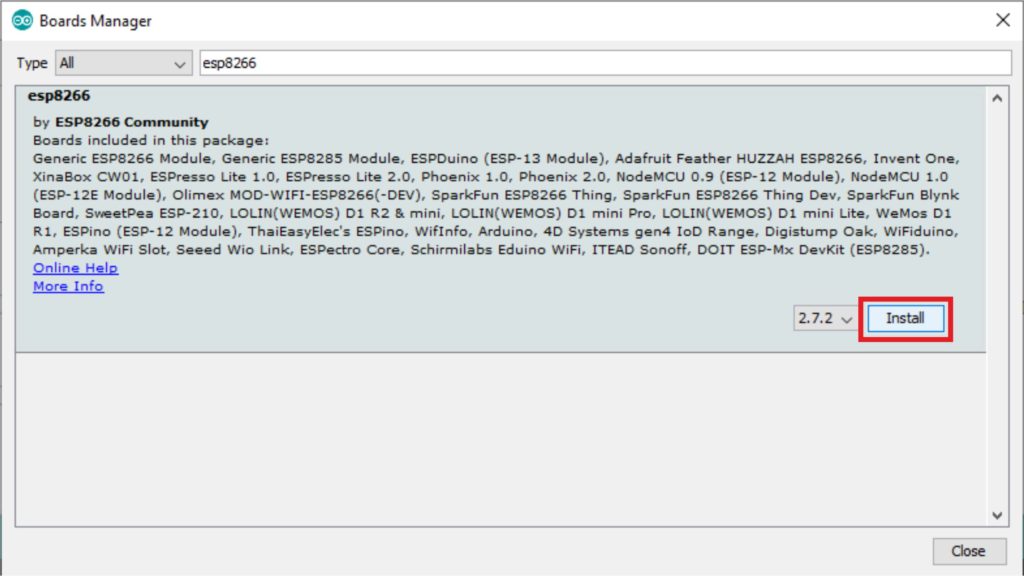
After a few minutes of installation, Arduino will install the esp8266 support to Arduino IDE and installed will be displayed in front of the name.
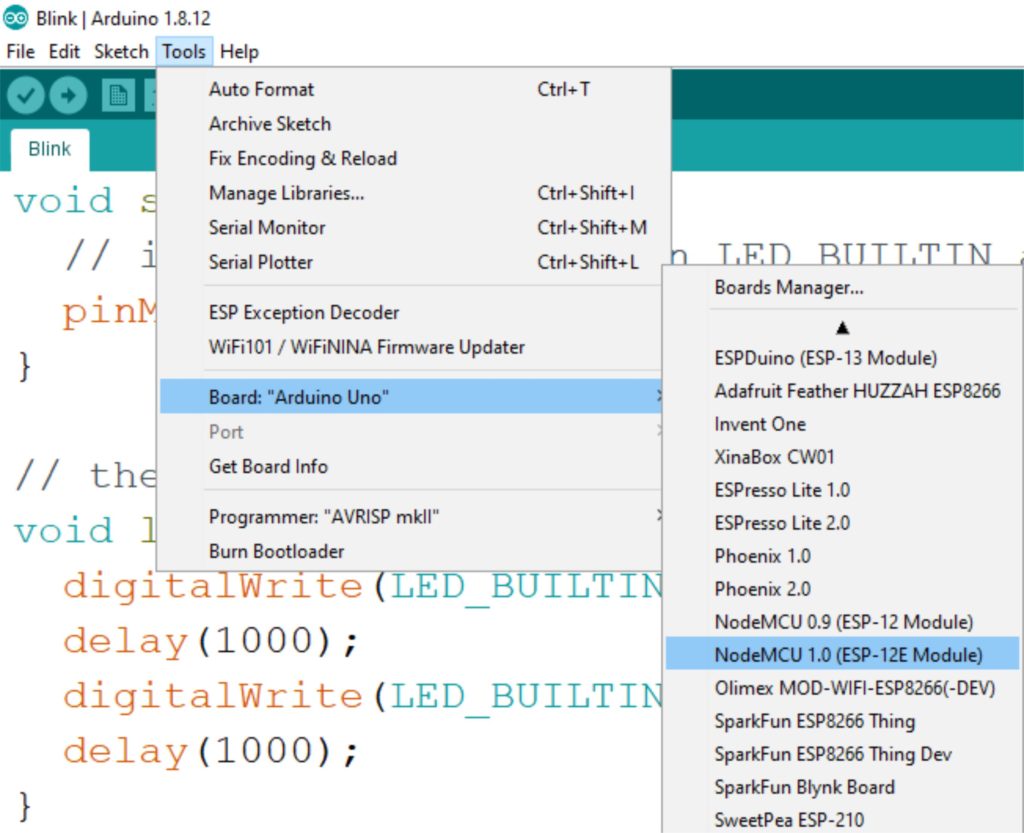
Now Go to Tools > Board and scroll down and you can find the esp8266 supported boards in the list as shown below, select the appropriate board and start making cool IoT projects.