
In this tutorial, we will learn how to control a single-channel 5v relay module with Arduino.
NOTE: Please note that relay mounted on this board is 5v, not 12v relay.
Item Required:
- Single-channel 5v relay board – 1Nos.
- Arduino UNO – 1 Nos.
- Hobby DC Motor – 1 Nos.
- USB Cable A to B type – 1 Nos.
- Jumper Wire M/M
- Jumper Wire M/F
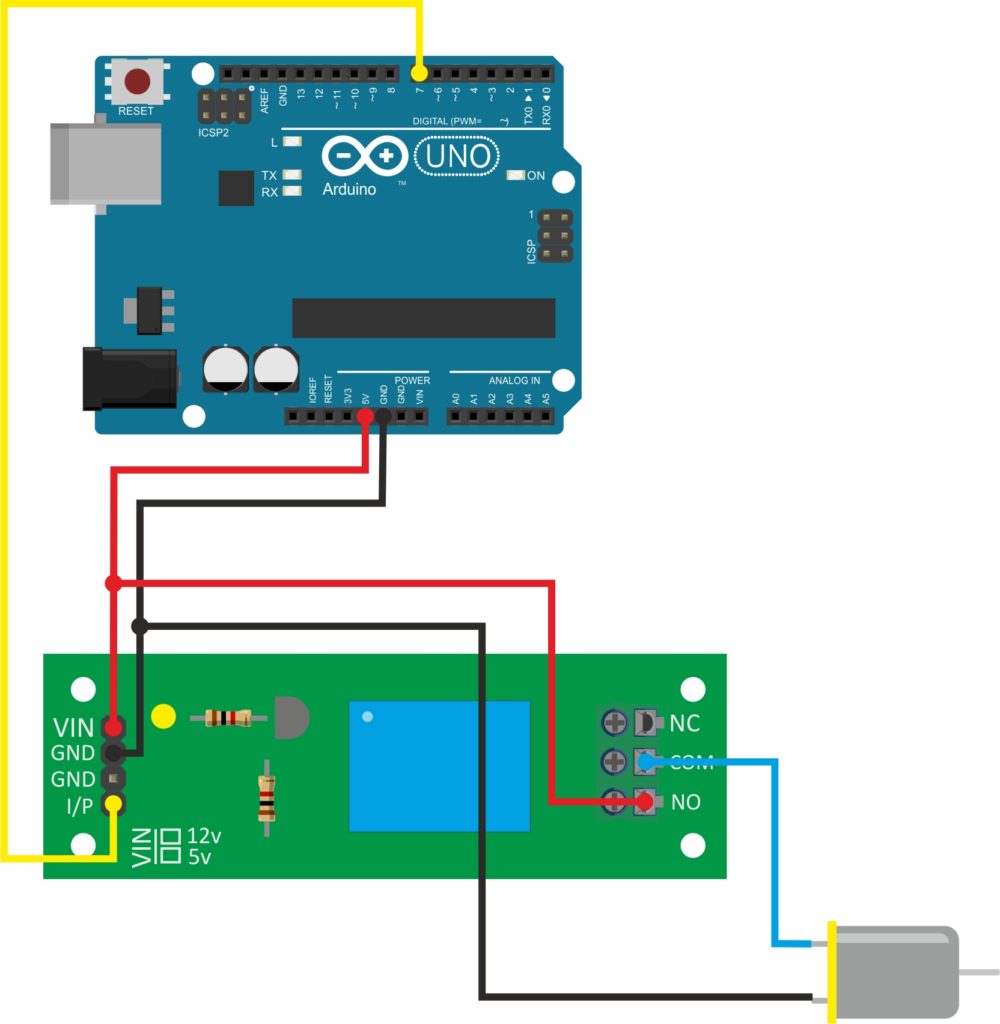
Connections:
Code:
// visit https://roboindia.com/tutorials/ for more tutorials.

int relay = 7;

// the setup function runs once when you press reset or power the board
void setup() {
  // initialize digital pin LED_BUILTIN as an output.
  pinMode(relay, OUTPUT);
}

// the loop function runs over and over again forever
void loop() {
  digitalWrite(relay, HIGH);   // turn the LED on (HIGH is the voltage level)
  delay(2000);                       // wait for a second
  digitalWrite(relay, LOW);    // turn the LED off by making the voltage LOW
  delay(2000);                       // wait for a second
}