
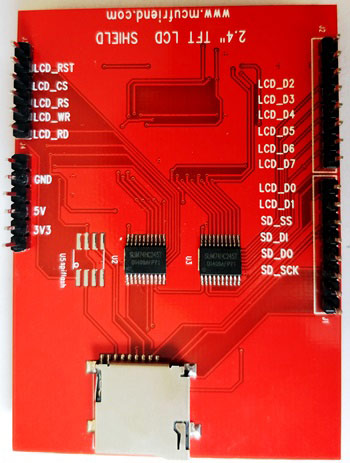
This tutorial of Robo India explain the working of 2.4″ touchsreen LCD shield.
1. Introduction:
Hello, this a tutorial for beginners about the TFT LCD touch screen shield mounted on an Arduino UNO board, where we use some basic display functions and a little touch function, all this with simple and detailed functions.
2. Required Hardware
| S.No. | Item | Quantity |
| 1. | Arduino UNO | 1 |
| 2. | 2.4″ Touchscreen LCD | 1 |
3. Hardware Interfacing
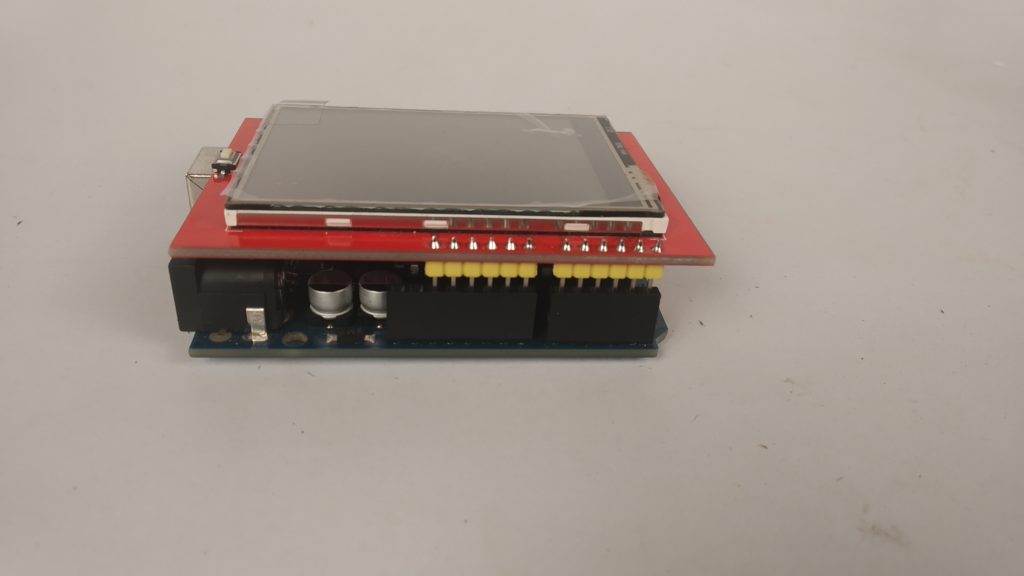
The 2.4” TFT LCD screen is a perfect Arduino Shield. You can directly push the LCD screen on top of the Arduino Uno and it will perfectly match with the pins and slid in through. However, as matters of safety cover the Programming terminal of your Arduino UNO with a small insulation tape, just in case if the terminal comes in contact with your TFT LCD screen. The LCD assembled on UNO will look something like this below.
4. Library File
Following library will be required to run this sketch. Download the zip file extract the same and copy this to your Arduino library folder.
This library file should be placed at the install folder of Arduino. I have a 64 bit Win7 OS and my Arduino library folder address is located at
C:\Program Files (x86)\Arduino\libraries
1 Adafruit_GFX library
You may download library file from here.
2 Adafruit_TFTLCD library
You may download library file from here.
3 TouchScreen library
You may download library file from here.
5. Programming
You may download this Arduino Sketch from here.
#include <Adafruit_GFX.h>    // Core graphics library
#include <Adafruit_TFTLCD.h> // Hardware-specific library
#include <TouchScreen.h>

#define YP A3  // must be an analog pin, use "An" notation!
#define XM A2  // must be an analog pin, use "An" notation!
#define YM 9   // can be a digital pin
#define XP 8   // can be a digital pin

#define TS_MINX 140
#define TS_MINY 120
#define TS_MAXX 910
#define TS_MAXY 920

// For better pressure precision, we need to know the resistance
// between X+ and X- Use any multimeter to read it
// For the one we're using, its 300 ohms across the X plate
TouchScreen ts = TouchScreen(XP, YP, XM, YM, 300);

#define LCD_CS A3
#define LCD_CD A2
#define LCD_WR A1
#define LCD_RD A0
#define LCD_RESET A4

Adafruit_TFTLCD tft(LCD_CS, LCD_CD, LCD_WR, LCD_RD, LCD_RESET);

int32_t answer = 0;

char keyarray1[2];
char keyarray2[2];
int32_t keyarray1i = 0;
int32_t keyarray2i = 0;

long Time = 0;
long millicount = 0;
int interval = 1000;
int screenTimout = 15;

// Assign human-readable names to some common 16-bit color values:
#define BLACK   0x0000
int32_t BLUE = tft.color565(50, 50, 255);
#define DARKBLUE 0x0010
#define VIOLET 0x8888
#define RED     0xF800
#define GREEN   0x07E0
#define CYAN    0x07FF
#define MAGENTA 0xF81F
#define YELLOW  0xFFE0
#define WHITE   0xFFFF
#define GREY   tft.color565(64, 64, 64);
#define GOLD 0xFEA0
#define BROWN 0xA145
#define SILVER 0xC618
#define LIME 0x07E0
#define ORANGE 0xFD20
#define ORANGERED 0xFA20

#define minpressure 5
#define maxpressure 1000


void draw()
{
  tft.fillScreen(WHITE);
  tft.fillRoundRect(2, 7, 235, 70, 8, YELLOW);
  tft.drawRoundRect(2, 7, 235, 70, 20, RED);
}

void drawintro()
{
  tft.fillScreen(BLACK);
   tft.fillScreen(RED);
    tft.fillScreen(YELLOW);
    tft.fillScreen(BLACK);
  tft.setTextSize(3);
  tft.drawRoundRect(10,0, 220, 319, 20, RED);

  tft.setTextColor(BLUE);
  tft.setCursor(30, 100);
  tft.print("Welcome To");
  tft.setCursor(30, 130);
  tft.setTextColor(YELLOW);
  tft.print("ROBO INDIA");
  tft.setCursor(30, 160);
  tft.setTextColor(RED);

  tft.setTextColor(WHITE);

  tft.print("  Touch here ");
  tft.setCursor(30, 50);
  tft.fillRoundRect(20, 40, 200, 40, 8, YELLOW);
  tft.setTextColor(RED);

  digitalWrite(13, HIGH);
  TSPoint p = ts.getPoint();     // Read touchscreen
  digitalWrite(13, LOW);

  pinMode(XM, OUTPUT);
  pinMode(YP, OUTPUT);

  int i = 1;

  while (i == 1)
  {
    digitalWrite(13, HIGH);
    TSPoint p = ts.getPoint();     // Read touchscreen
    digitalWrite(13, LOW);

    pinMode(XM, OUTPUT);
    pinMode(YP, OUTPUT);

    if (p.z > minpressure && p.z < maxpressure)
    {
      return;
    }
  }
}


void screenSaver()
{
  digitalWrite(13, HIGH);
  TSPoint p = ts.getPoint();     // Read touchscreen
  digitalWrite(13, LOW);
  //
  pinMode(XM, OUTPUT);
  pinMode(YP, OUTPUT);

  tft.fillScreen(BLACK);
  tft.setCursor(30, 100);
  tft.print("ENTERING");
  tft.setCursor(10, 150);
  tft.print("SCREEN SAVER");
  tft.setCursor(50, 200);
  tft.print("MODE");
  delay(1000);
  tft.fillScreen(RED);

  int i = 0;
  while (i == 0)
  {
    for (int i = 0; i < 150; i++)
    {
      int color = tft.color565(random(255), random(255), random(255));
      int x = random(350);
      int y = random(350);
      int r = random(30);

      tft.fillCircle(x, y, r, color);

      TSPoint p = ts.getPoint();     // Read touchscreen
      digitalWrite(13, LOW);

      pinMode(XM, OUTPUT);
      pinMode(YP, OUTPUT);
    }
  }
}
void setup()
{
  keyarray1[0] = '\0';
  keyarray2[0] = '\0';

  Serial.begin(9600);
  tft.begin(0x9341);  // if it is not work try for 9325 ,9328,7575,8347,8357
  tft.setRotation(2);
  drawintro();
  //tftheight = tft.height();
  //tftwidth = tft.width();
  draw();
  tft.setCursor(10, 30);
}

void loop()
{
  digitalWrite(13, HIGH);
  TSPoint p = ts.getPoint();     // Read touchscreen
  digitalWrite(13, LOW);

  pinMode(XM, OUTPUT);
  pinMode(YP, OUTPUT);

 int  x = map(p.x, TS_MINX, TS_MAXX, tft.width(), 0);
 int y = map(p.y, TS_MINY, TS_MAXY,  tft.height(), 0) + 30;

  if ((millis() - millicount) > interval)
  {
    millicount = millis();
    Time += 1;
  }
  if (Time >= screenTimout && (p.z < 5 || p.z > 1000))
  {
    screenSaver();
    Time = 0;
  }

  if (p.z > 10 && p.z < 1000)
  {
    Time = 0;
    millicount = millis();
  }
  if (p.z > minpressure && p.z < maxpressure)
  {
     tft.print("www.RoboIndia.com");

  }

}
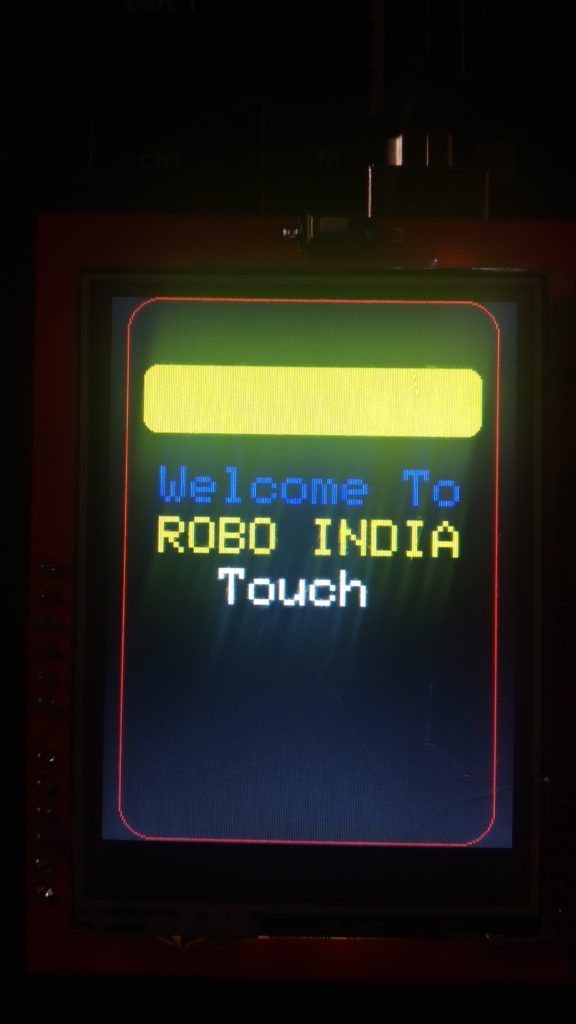
6. Output
After uploading the code you will see this on screen and when you touch you will see another sceen.
If you have any query please write us at support@roboindia.com
Thanks and Regards
Content Development Team
Robo India
https://roboindia.com
Question:
1. do you use GPIO pin LCD_D0 to LCD_D7?
2. how does this module run with ESP8266?