
As now you are familiar with electricity and how LED glows when electric current flows through it.
Check this tutorial: What is electricity?
Now we will control the LED using the Arduino.
Arduino
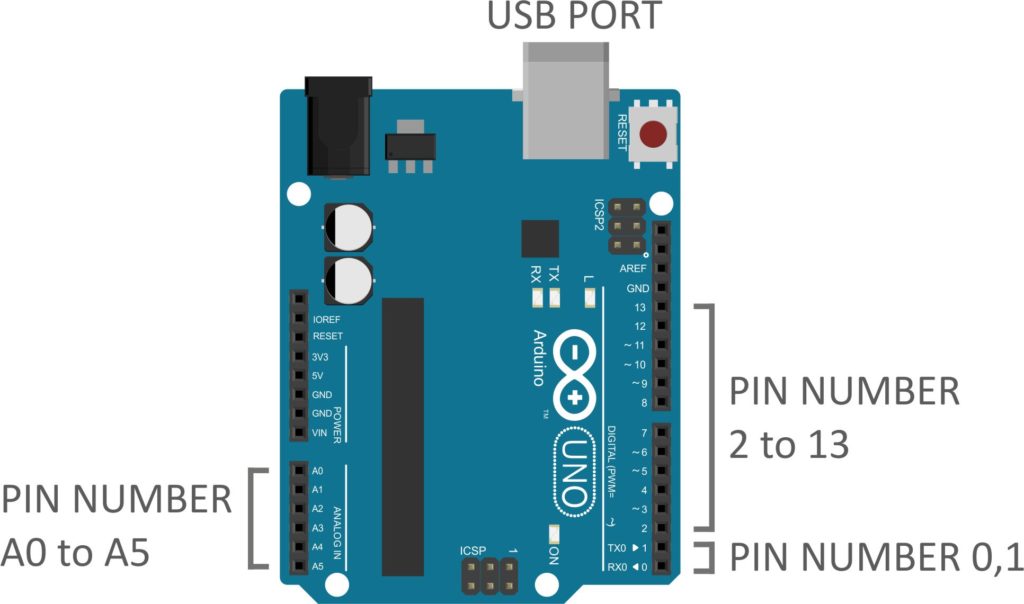
PIN NUMBER – 0, 1 – RX, TX (Programming Pin)
PIN NUMBER 2 to 13 – Digital input output pin.
PIN NUMBER A0 to A5 – Analog input pin.
PIN NUMBER 2 to 13 – Digital input-output pin.
In this tutorial, we will talk about the digital input-output pin only.
Arduino boards can read inputs like light on a sensor, finger on a button or temperature of a room and can give output like activating a motor, flashing and LED and switching heater on-off.
Digital output:
Digital output from Arduino can be in the form of ‘1’ or ‘0’
Digital 1 = 5v
Digital 0 = 0v or GND
This means in the Arduino code you write ‘1’ on output pin you will get ‘5v’ output.
Or ‘0’ in Arduino code means ‘0v’ output on the pin.
Write your first code in Arduino.
Download the Arduino IDE:
Follow this tutorial link on how to download the Arduino IDE on your computer.
Circuit:
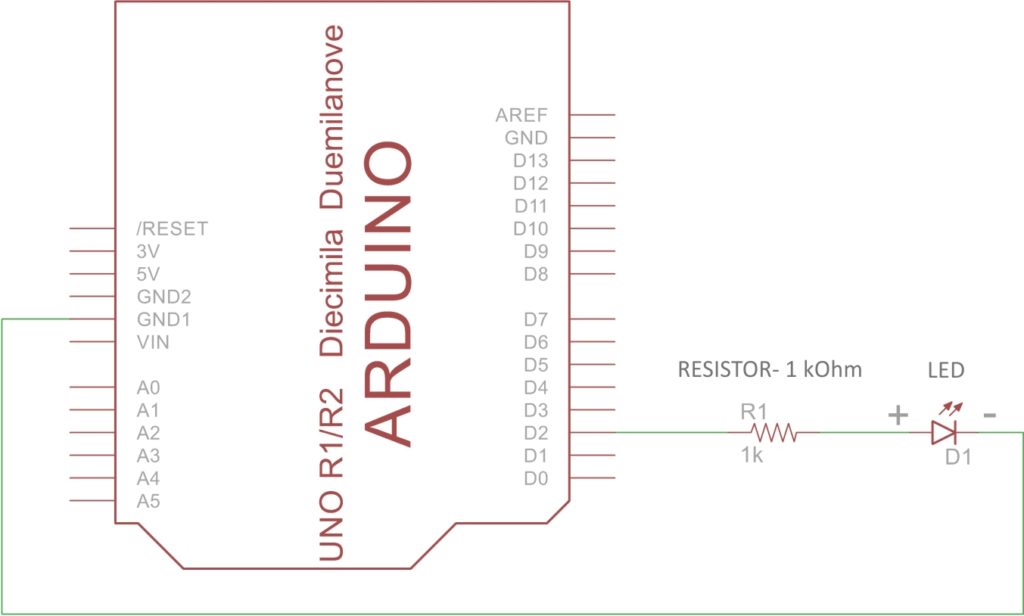
Breadboard connection:
Code
After the connection on breadboard write the below code in Arduino.
// the setup function runs once when you press reset or power the board
void setup() {
  // initialize digital pin LED_BUILTIN as an output.
  pinMode(2, OUTPUT);
}

// the loop function runs over and over again forever
void loop() {
  digitalWrite(2, HIGH);   // turn the LED on (HIGH is the voltage level)
  delay(1000);                       // wait for a second
  digitalWrite(2, LOW);    // turn the LED off by making the voltage LOW
  delay(1000);                       // wait for a second
}
Define PIN-2 as output.
pinMode(2, OUTPUT);
The above function is used to define a particular pin as input or output.
pinMode( PIN NUMBER, INPUT/OUTPUT)
Set output to high that is digital 1 (5v).
digitalWrite(2, HIGH); // turn the LED on (HIGH is the voltage level)
digitalWrite( PIN NUMBER, HIGH/LOW)
Practice problems:
- Write a similar code but LED is connected to pin number- 6.
- Connect 2 LED on 2 different pin of Arduino and blink them one by one.
- Connect 3 LED of 3 different colors and blink them in a series.
Pingback:What is Electricity? - Robo India || Tutorials || Learn Arduino || Robotics